VMware vCenter can use a multitude of authentication methods, such as LDAP, Active Directory and SAML (ADFS), however since vCenter 8.0 U1 the ability to integrate with OKTA for authentication has been added, which allows for adding MFA (multi-factor authentication) for enhanced security and detaching the vCenter appliance from Active Directory.
When switching to use OKTA based authentication there is then a need to manage the SSO User and Group accounts, something that was previously not necessary when vCenter was joined to Active Directory. vCenter offers SCIM User Provisioning support to allow the creation, update and removal of user and group accounts within vCenter via a RESTful API. You can find guides on this in the “Additional Information” section at the bottom of the page.
At the time of writing SCIM User Provisioning requires OKTA to be able to talk directly to the API on your vCenter to SCIM provision users, now this is a non-starter security wise, as we are not exposing vCenter directly to the Internet. However, with the correct runes you can administer user and group accounts via the API with SCIM directly from within the network rather than OKTA provisioning and administering accounts.
The documentation has been based on: Enable Okta for VMware vCenter Server.
Operational
To operationally manage SSO Users and Groups within vCenter using the REST API with SCIM, you can find the following guide within this section. These assume that you have already configured the link between vCenter and OKTA for user authentication, for instructions on this see section: “Implementation and Configuration”.
The VMware SCIM Guide: https://github.com/vmware/idm/wiki/SCIM-guide, although written for VMware IDM can be used for VMware vCenter assuming the URLs are amended as described below.
There are additional fields (attributes) that may be added to a user or group either during or post creation, see the SCIM Guide above for more details.
ExternalID and Why it is Important
During the configuration we came across the ExternalID field, this is essential to allowing the OKTA OIDC authentication to work, you can find in the section below entitled: “User Fetching Exception – User Not Found” a more complete explaination, but the take home is that you need to ensure that you know the value of the NameID attribute in OKTA for each user, because this is mapped to the ExternalID for the corresponding account within vCenter and is used by vCenter when matching the OIDC authentication request when it is passed via the client from OKTA.
i.e. OKTA NameId → vCenter ExternalId
Finding what this NameId is for each user is out of the scope of this document, but it can be found by examining the logs of failed logon attempts or better still by querying the OKTA API directly to determine it. Note that the NameID value may not be the same for a particular user across all applications.
Bearer Token
Using CURL it is helpful to put the Bearer Token into a variable so it’s easier to use.
export VCENTER_BEARER=<Bearer Token String>List Users
To list the users currently in vCenter as SSO users you can run the following, and optionally output via “json_pp” to give you a more pretty output!
curl -v -k https://<vCenter FQDN>/usergroup/t/CUSTOMER/scim/v2/Users -H "Authorization: Bearer $VCENTER_BEARER"List Groups
To list the groups currently in vCenter as SSO groups, you can run the following and optionally output via “json_pp” to give you a more pretty output!
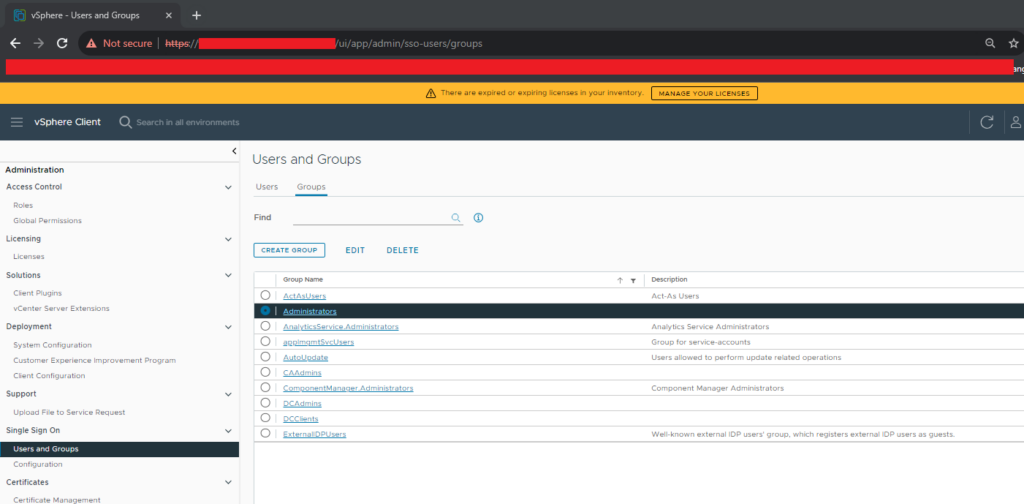
curl -v -k https://<vCenter FQDN>/usergroup/t/CUSTOMER/scim/v2/Groups -H "Authorization: Bearer $VCENTER_BEARER"The SSO Groups are not visible (at the time of writing) in the VMware vCenter GUI, you can only see these via the REST API (using the query above), or when selecting the SSO group for use in assigning its membership of a vCenter group.
Create User
To create a user, first populate the contents of the JSON file “create_scim_user.json with the details for that particular user, you need the externalId for that application from OKTA, it is essential this value is created and match the value that is supplied by OKTA during logon, if you do not have this value populated vCenter cannot match the incoming authentication attempt with the account that SCIM has created.
curl -v -k https://<vCenter FQDN>/usergroup/t/CUSTOMER/scim/v2/Users -d @create_scim_user.json -H "Authorization: Bearer $VCENTER_BEARER" -H "Content-Type: application/scim+json"For example populate the required fields in the file:
- emails:value
- familyName
- givenName
- userName
- externalId
The “externalId” can be found from OKTA, although vCenter will generate an “Id”, this is different from the account’s “externalId”.
create_scim_user.json
{
    "emails": [
        {
            "value": "bob.smith@domain.com"
        }
    ],
    "name": {
        "familyName": "Smith",
        "givenName": "Bob"
    },
    "schemas": [
        "urn:ietf:params:scim:schemas:core:2.0:User",
        "urn:ietf:params:scim:schemas:extension:ws1b:2.0:User"
    ],
    "userName": "bob.smith",
    "externalId": "00u17ayjOil3jVOq9416"
}
Create Group
To create a group,
curl -v -k https://<vCenter FQDN>/usergroup/t/CUSTOMER/scim/v2/Groups -d @create_scim_group.json -H "Authorization: Bearer $VCENTER_BEARER" -H "Content-Type: application/scim+json"For example populate the required fields in the file:
- displayName
You cannot add users to a group at the point of creation, you must first add the group, then assign users to the group.
create_scim_group.json
{
    "displayName": "vCenterAdmins",
    "schemas": [
        "urn:scim:schemas:core:1.0"
    ]
}
Add SSO Group to vCenter Group
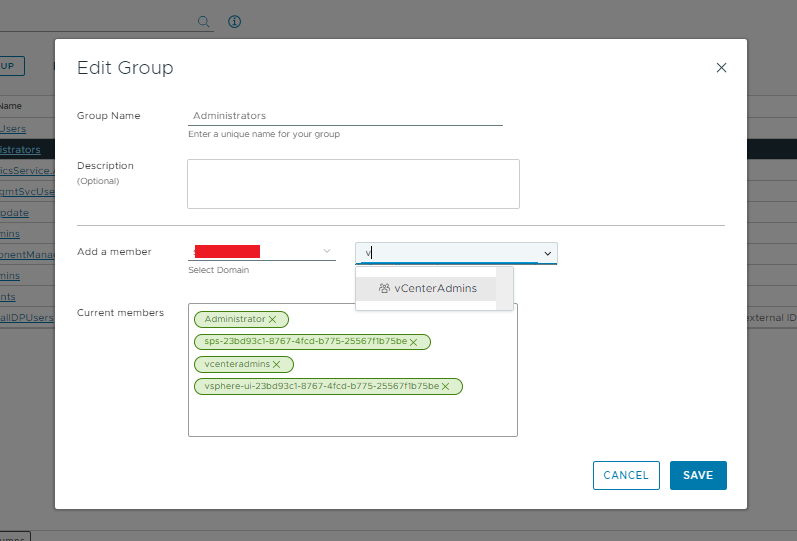
You only need to do this action once per group, i.e. once you have a SSO group, to ensure it has vCenter permissions you need to add it to a vCenter Group of which you can assign permissions to actually allow you to take actions. In this example we are creating an SSO Group called “vCenterAdmins” then adding it to the vCenter Group: “Administrators”.
Adding the SSO Group to the vCenter group, then adding SSO Users to the SSO Group which then gives them vCenter Group permissions is (at the time of writing) the only way to achieve assigning permissions to an SSO User via SCIM. I.e. you can’t directly add a SSO User to a vCenter group via SCIM, so you need to add the SSO User to a SSO Group, and that SSO Group needs to be a member of the vCenter group (with the correct permissions). Doing this avoids you having to perform a manual step via the GUI to assign a SSO User to a vCenter group.
Add the SSO Group “vCenterAdmins” to your vCenter Group.
Add Group Members
To add a member to the group, you first need the following bits of information
- Group’s ID
- User’s ID
You’ll need the group “Id” in the URL and the user “Id” in the JSON file.
curl -v -k -X PATCH https://<vCenter FQDN>/usergroup/t/CUSTOMER/scim/v2/Groups/<Group ID> -d @vCenterAdmin-update_scim_group.json -H "Authorization: Bearer $VCENTER_BEARER" -H "Content-Type: application/scim+json"You may need to use the “json-patch+json” content type.
For example populate the required fields in the file:
- value (must contain the ID of the user who you wish to add into the group.
It should be possible to add multiple members at one time, but this was not tested.
vCenterAdmin-update_scim_group.json
{
    "schemas": ["urn:ietf:params:scim:api:messages:2.0:PatchOp"],
    "Operations":[
        {
            "op":"add",
            "path": "members",
            "value": [
                {
                    "value": "29f7bac3-379e-4608-9098-86ba2fc633ee"
                }
            ]
        }
    ]
}
List Group Members
You need to find the Group’s ID, so you can enter it to see the members of just that group.
curl -v -k https://<vCenter FQDN>/usergroup/t/CUSTOMER/scim/v2/Groups/<Group ID> -H "Authorization: Bearer $VCENTER_BEARER"Remove Group Members
To remove a user from a group, you need to PATCH including the Group ID and then the following JSON file.
curl -v -k -X PATCH https://<vCenter FQDN>/usergroup/t/CUSTOMER/scim/v2/Groups/<Group ID> -d @vCenterAdmin-delete_scim_group_member.json -H "Authorization: Bearer $VCENTER_BEARER" -H "Content-Type: application/scim+json"
You may need to use the “json-patch+json” content type.
For example populate the required fields in the file:
- value (must contain the ID of the user who you wish to add into the group)
Notice the “op” as “remove” to remove the member from the group, don’t use the DELETE method, otherwise you’ll delete the whole group!
vCenterAdmin-delete_scim_group_member.json
{
    "schemas": ["urn:ietf:params:scim:api:messages:2.0:PatchOp"],
    "Operations":[
        {
            "op":"remove",
            "path": "members",
            "value": [
                {
                    "value": "29f7bac3-379e-4608-9098-86ba2fc633ee"
                }
            ]
        }
    ]
}
Delete Group
To remove a group, you can run the following, you require the Group ID (id) to be specified, you can find this ID by listing the groups.
curl -v -k -X DELETE https://<vCenter FQDN>/usergroup/t/CUSTOMER/scim/v2/Groups/<Group ID> -H "Authorization: Bearer $VCENTER_BEARER"Delete User
To delete a user, you can run the following, like removing a group you only need to provide the User’s ID (id), which you can find by listing all the user accounts. Note you do not need to remove the user account from any groups first.
curl -v -k -X DELETE https://<vCenter FQDN>/usergroup/t/CUSTOMER/scim/v2/Users/<User ID> -H "Authorization: Bearer $VCENTER_BEARER"Regenerate/Rotate User Provisioning Token
The User Provisioning Token which is used by SCIM User provisioning requires a manual regeneration and rotate periodically, to do this access the folllowing menu and regenerate the token, then update the token in any locations where it is used.
Administration → Single Sign On → Configuration → Identity Provider

Implementation and Configuration
The configuration of vCenter to use OpenID Connect (OIDC) with SAML can be found at: Enable Okta for VMware vCenter Server.
he configuration follows this procedure, however the following changes and ommissions were required for our environment:
1. Domain Name(s)
The Active Directory domain needed to be entered as “internal.sanger.ac.uk” which is the SSO username.
2. OpenID Connect – Configuration URL
The Configuration URL provided in the documentation did not work in our environment this needed to be changed from: https://yourdomain.okta.com/oauth2/default/.well-known/openid-configuration to https://yourdomain.okta.com/.well-known/openid-configuration.
3. User Provisioning Token Lifespan
You may consider changing this to suit your environment, in our case we changed this to 12 Months to avoid the need to rotate the key within our provisioning script too frequently.
User Fetching Exception – User Not Found
During configuration, We were experiencing this issue: “User fetching exception with nameId b1e5f84d-xxxx-xxxx-xxxx-a7bfecxxxxc4, nameIdFormat ExternalId, and domains [], user not found”. although Spencer Shirley’s article: vCenter 8.0u2 MFA with Entra ID is for EntraID is the cause was the same in our case, the externalId attribute was missing from our user account entry, the externalId should contain the value of the nameId from OKTA as vCenter uses this to match the incoming authentication request against the correct user in vCenter (created by SCIM).
If you look in the following log file (and if required grep for the following field) you can see the logon failure error shown.
$ cat /var/log/vmware/vc-ws1a-broker/federation-service.log | grep "User fetching"As you can see the is a “User fetching exception”, annoyingly you never see the username, because in this case it cannot match the user name against anything to know which one it is. But you can see the nameId value “00u173453jVOqyjO9416” of the user account, this is what needed to be populated in the externalId attribute of the user account.
2023-11-24T18:56:04,052 WARN  vcenter.domain.com:federation (auth-common-forkjoin-pool1) [CUSTOMER;-;10.100.100.101;460c0397-82bd-4539-95bb-067467d34794;-;9b12147f-9e0f-4af3-9b0f-b7c0e497fd01] com.vmware.vidm.federation.login.processor.AuthResponseUserResolver - User fetching exception with nameId 00u173453jVOqyjO9416, nameIdFormat ExternalId, and domains [domain.com, internal.domain.com], user not found
2023-11-24T18:56:33,442 WARN  vcenter.domain.com:federation (auth-common-forkjoin-pool1) [CUSTOMER;-;10.100.100.101;4801ee5b-4e76-41dd-8428-eb809c196245;-;8412d468-f1dc-4071-b74f-d21c41786a85] com.vmware.vidm.federation.login.processor.AuthResponseUserResolver - User fetching exception with nameId 00u173453jVOqyjO9416, nameIdFormat ExternalId, and domains [domain.com, internal.domain.com], user not found
A working logon looks like this for the username bob.smith.
2023-11-29T09:47:48,393 INFO  vcenter.domain.com:federation (federation-business-pool-0) [CUSTOMER;-;10.100.100.101;b389e70d-6731-4453-9893-24eddf1da545;-;c4dd46da-4d01-4866-850e-1f6785d54a92] com.vmware.vidm.federation.token.TokenPersistenceService - Generated token with Id 96d50afa-1234-43a8-9c20-1487e2437ede and calling rest endpoint to add to Token service
2023-11-29T09:47:48,437 INFO  vcenter.domain.com:federation (federation-business-pool-1) [CUSTOMER;-;10.100.100.101;b389e70d-6731-4453-9893-24eddf1da545;-;c4dd46da-4d01-4866-850e-1f6785d54a92] com.vmware.vidm.federation.login.LoginEventServiceAspect - Login successful for context: c4dd46da-1234-4866-850e-1f6785d54a92 and username: Optional[bob.smith] domain: Optional[Optional[domain.com], resourceUuid: Optional.empty
Login URL
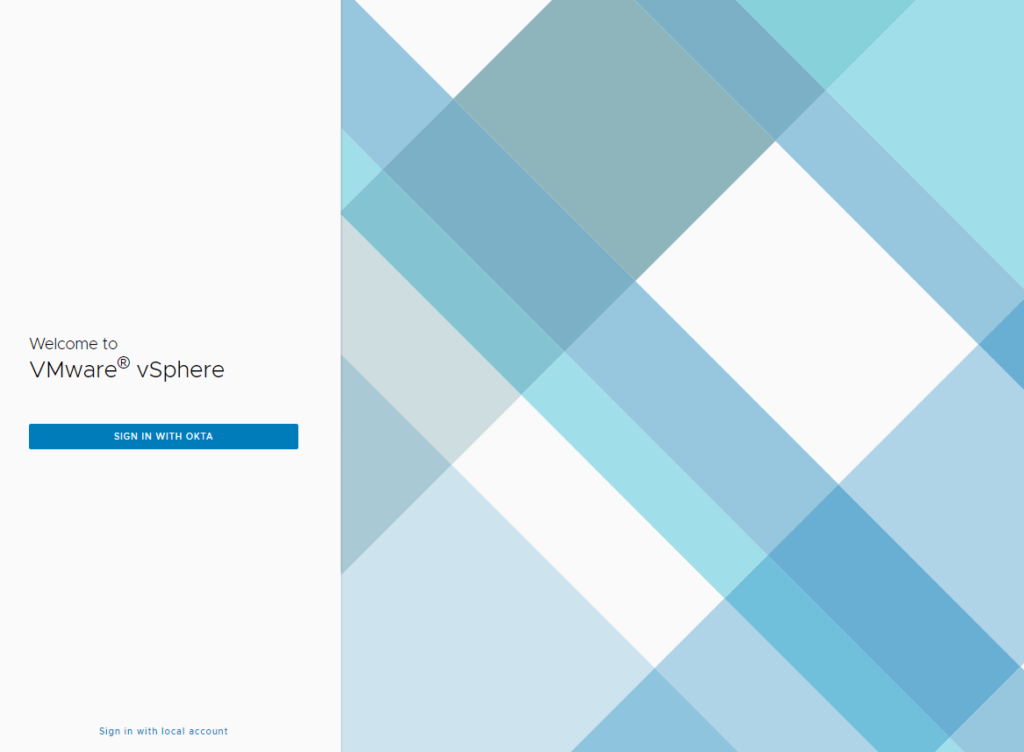
To login you would use the URL https://<vCenter FQDN>/ui/login, where you get a logon page that specifies the “Sign in with OKTA” button, if you need to login locally, i.e. not via OKTA but using the local or SSO account, you can click “Sign in with local account” at the bottom.