Microsoft Exchange provides the capability to allow publishing of user calendars to the Internet, this is different from calendar sharing (which is typically internal, i.e. within our organisation). These instructions explain how to enable publishing by policy and how to apply it your own user mailbox.
Calendar Publishing Policy Configuration on Microsoft Exchange
These steps have already been performed, they are here for reference so you can see how this configuration was performed. You need to create a sharing policy, then apply that sharing policy to users. The policy needs to be configured with the level of permissions available for a user to select when they choose to share their mailbox. In the example below we have created a policy that shares free/busy information, once the policy is created you can apply it to a user:
New-SharingPolicy -Name "Internet Calendar Publishing Policy"-Domains 'Anonymous: CalendarSharingFreeBusySimple'-Enabled $trueWhen run we got this warning, we ignored it, it appears this setting does not appear to apply to Microsoft Exchange 2016, or has already been run by default:
WARNING: This sharing policy enables anonymous calendar features. Verify that the Calendar virtual directory has been enabled on the Client Access servers by running the following Shell command: Set-OwaVirtualDirectory-AnonymousFeaturesEnabled $true.Additional sharing information can be provided (i.e. rather than just free/busy, showing more detail of the items) another Publishing Policy was created as follows:
New-SharingPolicy -Name "Internet Calendar Publishing Policy Detail"-Domains 'Anonymous: CalendarSharingFreeBusyDetail'-Enabled $trueThe “Internet Calendar Publishing Policy Detail” allows the calendar to be published with additional information for more detail you can refer to Microsoft’s documentation: Creating a sharing policy – Exchange 2013.
Enable Publishing for a User Mailbox
To enable the publishing for a user mailbox you just apply the policy to the user mailbox to enable publishing:
Set-Mailbox -Identity <user name> -SharingPolicy "Internet Calendar Publishing Policy"To check your settings:
Get-SharingPolicy <policy name> | format-listOnce the above has been performed by a System Administrator, the end-user performs these steps:
1. The user opens OWA (Webmail) e.g. http://owa.domain.com and logs in.
2. Click on “Calendar” button in the top left (from the dots).
3. Right click on your calendar, which is normally called “Calendar”.
4. Click on “Permissions…”.
5. Set the “Public Calendar” group (which means anyone on the Internet – who has your URL, see below) to whatever level of access you want, in this example “Availability Only”.
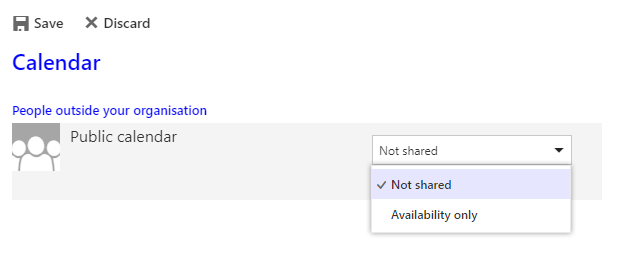
6. Then click on “Save”.
7.Now click on the “Options” (Cog) in the top right.
8.Then find “Calendar Publishing” setting that will have just appeared under “Shared Calendars” and click on it.
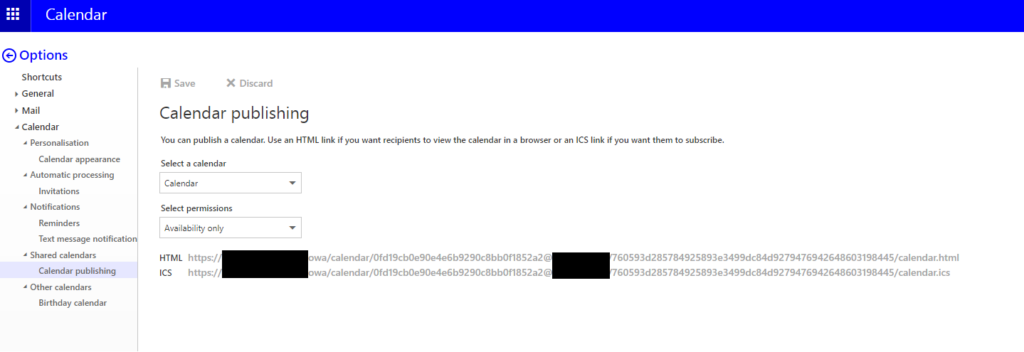
9. You’ll notice the two URLs one is just plain HTML showing your Calendar shared (with whatever restrictions the administrators have applied – in this case Free/Busy Only). Or you can access the calendar using ICS from any ICS enabled mail/calendaring client, e.g. Thunderbird, Outlook or Google GMail Calendar.
If you want to enable sharing of a calendar within a shared mailbox, the approach is the essentially the same as the above; however you need to do grant rights to a user who can login, because normally shared mailboxes are set as “Shared”, i.e. you can’t log directly in via OWA to the shared mailbox.
- You should grant yourself “Full Mailbox” rights over the shared mailbox
- Login via OWA as your user account, select “Open Another Mailbox…” from the top right and enter the shared mailbox name.
- Once logged in as the shared mailbox via OWA, perform the steps above to get the URL.
- Logout of OWA.
- Remove the “Full Mailbox” rights over the shared mailbox.
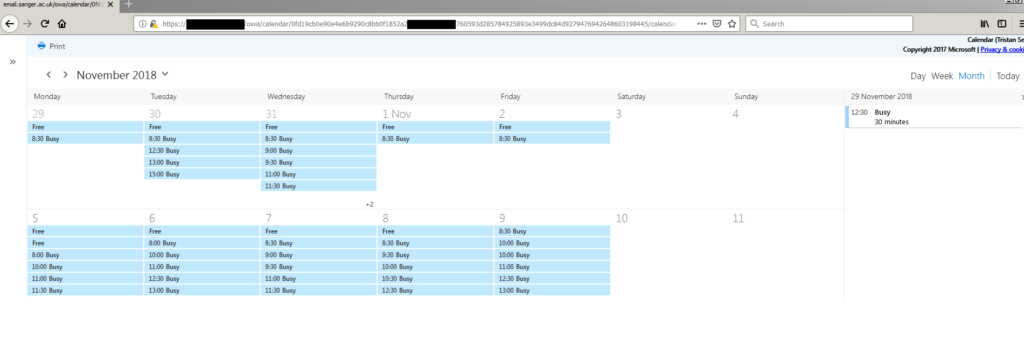
Accessing a Published Calendar via HTML
Once you have activated publishing of your calendar, you can share it with the URLs shown (above. The access is anonymous to Internet users, they don’t need to logon to view the calendar via HTML URL, you can pass them this URL and they can access your free/busy information (or whatever level of access you have provided) using the link, as you can see I’m very busy.
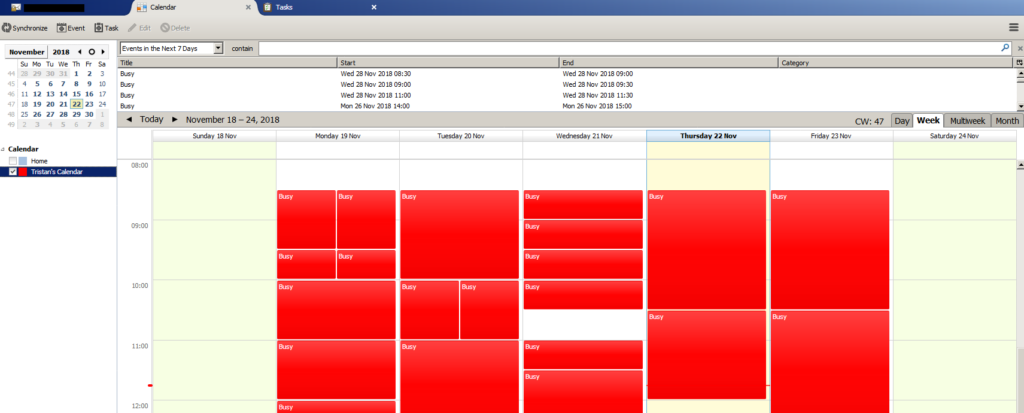
Accessing a Published Calendar via ICS (on Thunderbird)
To access the published calendar via an ICS supporting Email/Calendaring client e.g. Thunderbird (other ICS compatible clients are available, e.g. Microsoft Outlook or Google (GMail) Calendar) you can follow these steps:
- Open Thunderbird. Click on the “Calendar” tab, right click on the left hand pane (under your existing calendar).
- Click on “New Calendar”.
- From the wizard click on “On the Network” then “Next”.
- Select “iCalendar (ICS)” radio button, then paste in the URL you’ve been supplied by the user who is publishing their Calendar (i.e. the URL from above).
- You can chose to tick the box for offline support to enable caching locally within your Email/Calendaring client if you want to be able to view the calendar when not connected to the Internet. Then click on “Next”.
- On the final screen you can adjust the colour of the calendar, name and which email profile it will inhabit as you see fit. Click on “Finish” and you’ll see your calendar appear: