A simple HTML based status page tool that allows you as a system administrator to just edit a CSV file and have the tool generate you a pre-formatted HTML status page that you can upload to your favourite website.
The tool uses Python to read the CSV files for the status (of services) and any upcoming maintenance activities, it then renders the page ready for upload.
The tool is intended to be used within a Gitlab CI/CD pipeline and also uses AWS for the publishing of the generated site. It makes use of docker containers to create the environment to run python (to generate the page) and then uses the AWS CLI docker container to upload the content to AWS S3 bucket for publishing via AWS CloudFront.
Source Files
https://github.com/tristanhself/simplestatus/tree/main
Requirements
- AWS Account – Used to publish the created status page website using AWS CloudFront, using an AWS Generated SSL certificate and an AWS S3 Bucket to store the content (you’ll also have another S3 bucket for the storage of the logs).
- Domain Name – A DNS domain name that you’ll use for the status page, for example status.domain.com so you have a friendly name to use. You’ll also need this to generate the AWS SSL Certificate.
- Gitlab (with CI/CD Pipeline and Runner) – You can use your own on-premise or cloud based Gitlab instance, you’ll need a simple runner that can spin up docker containers to perform the pipeline job tasks.
Installation
To avoid going into huge detail, these instructions assume you have a working knowledge of DNS, AWS (including CloudFront) and Gitlab.
Step 1 – Create AWS SSL Certificate
Create SSL Certificate that references the FQDN(s) (of the site). Once created get the ARN of this certificate for use within this template. The certificate must be created in us-east-1 even if the CloudFront Distribution is not being used in us-east-1.
Step 2 – Deploy CloudFront Template
You’ll need to customise the CloudFront template to your site, update the two Parameters at the top of the file:
- Update the “Description” (line 2) with the primary FQDN of the website.
- DomainName
- CertificateARN (which you got in step 1)
Now you can deploy it either by uploading into the AWS CloudFormation GUI or running the command line e.g. :
aws cloudformation create-stack --template-body file://<Site FQDN>.yaml --stack-name <Site FQDN>NOTE: The Stack-Name must only contain letters, numbers and hyphens only.
Using the output CNAME for the CloudFront Distribution create a CNAME to point your site FQDN(s) at this CloudFront Distribution CNAME.
Step 3 – Create DNS Record
Create a DNS CNAME record in your DNS domain, for example status.domain.com and point it at the FQDN of the AWS CloudFront end point for your site.
Step 4 – Create IAM User Account (AWS Credentials)
Within AWS IAM, create a user and give it an inline permission policy to provide it with S3 PUT and GET access; this is so it can upload the generated files to the bucket for publishing.
When created you now need to create an “Access Key” for the CI/CD pipeline to use to upload the generated files. Take a note of the ACCESS KEY ID and SECRET ACCESS KEY you’ll need these shortly.
Also take note of the Origin S3 Bucket name, this you’ll need in a later step.
Step 5 – Create Repository on Gitlab
Create a private repository on Gitlab. And then upload/clone/fork the contents of the above link into it.
Step 6 – Add AWS Credentials to Gitlab Repository Pipeline Settings
Edit the repository “settings” to add three “variables” and then add the relevant values from the previous step.
AWS_ACCESS_KEY_ID
AWS_SECRET_ACCESS_KEY
S3_BUCKET – From the previous step.
The two AWS key IDs are standard names which the AWS CLI docker container is expecting to find, all you need to ensure is the correct values are entered.
Secondly ensure that you have either dedicated or shared runners available for this particular project or repo, if you are using gitlab.com it should have picked some shared runners automatically.
Step 7 – Customise Site Files
Now tweak some of the files to customise your site appearance.
- www/favicon.ico – Add your desired logo.
- www/logo.png – Add your desired logo.
- www/templates/index-template.html – You may wish to tweak the Jinja template to include some site or company name etc.
Step 8 – Update CSV Files, Test Site Upload and Publishing
To operationally use the site, all you now need to do is add information into the two files:
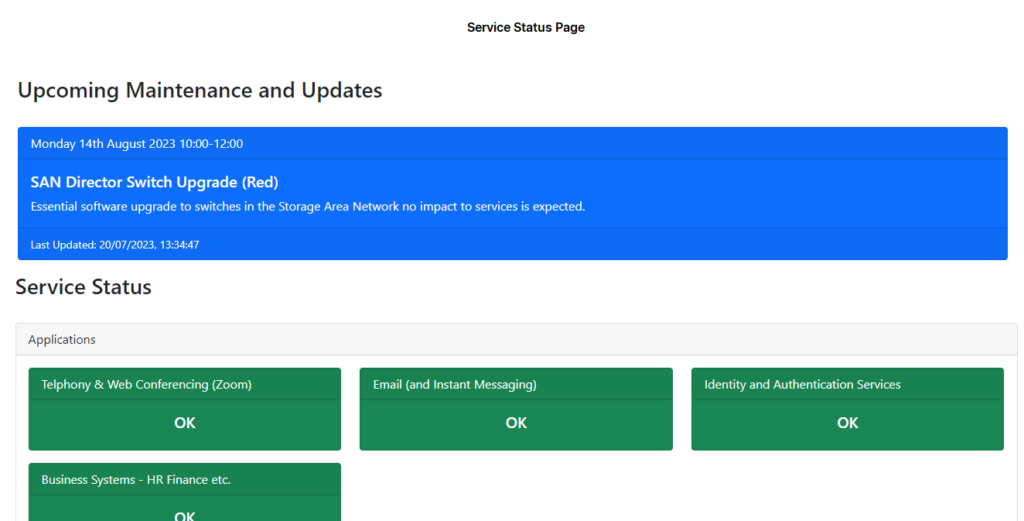
- maintenance.csv – Any planned maintenance activities, you add them in the format:
- date, time, title, content, impact, state
- status.csv – Add your services that you wish to inform users of the current status. Allowed statuses are OK, DEGRADED or FAILED.
- servicegroup, service, comment, status
When you commit this, the CI/CD pipeline will spin up the docker container, generate the files and then upload them to the S3 Bucket for publishing via the AWS CloudFront distribution.
Be aware that first upload of the file can take a while to first appear, however the AWS CloudFormation template has a configuration to ensure that the index.html file is not cached so any changes you make are rapidly available to your users.
Example